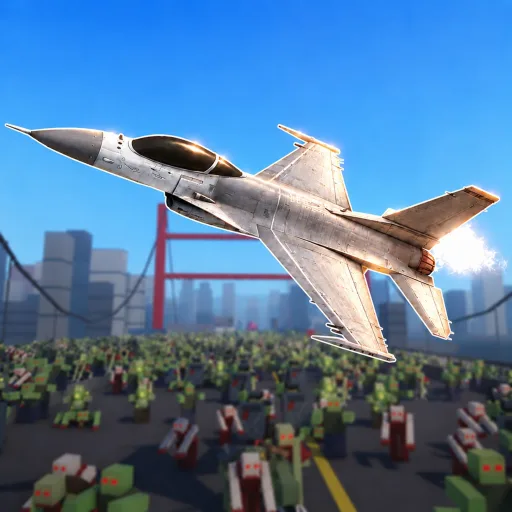
How waves work in Zombie Air Force and how to survive them: target priority, defense placement, resource discipline and squad coordination.
Zombie Air Force Waves: Survival Tips & Strategy
Waves in Zombie Air Force are the core PvE loop: clear escalating zombie hordes from the air while dropping ground defenses to hold the line, then push the front line season by season. Surviving late waves comes down to target priority, defense placement on the lanes that flood, and never letting a Behemoth fight swallow your whole squad's attention.
- Core loop — air-clear waves + ground defense drops, confirmed by the developer
- Escalation — waves feed the seasonal front line push
- Kill priority — clusters to rockets, strays to chain gun, bosses to strike loadouts
- Failure state — the ground line, not the aircraft, is what usually collapses first
What a Wave Actually Is
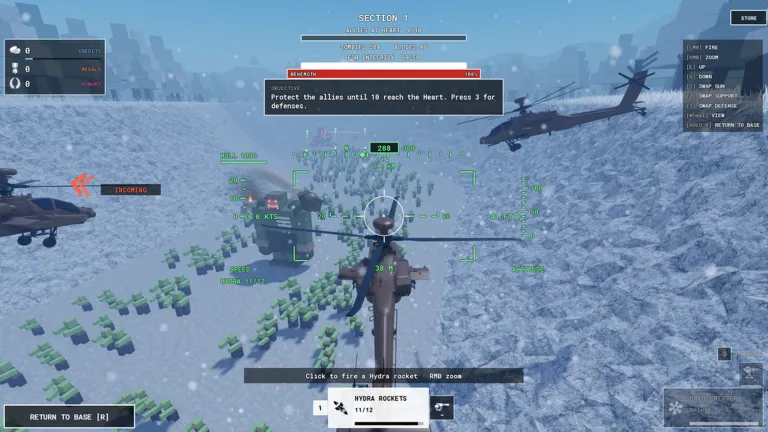
The official description frames the game as air combat with rockets, chain gun fire and air strikes against zombie waves, paired with deployable ground defenses. That loop — fly, clear, deploy, repeat — is confirmed. What is not published: wave counts, per-wave spawn compositions, timer lengths, and how difficulty scales per cycle. No official source, tracker or fan wiki has datamined or documented a wave table, so treat any specific "wave 15 spawns X" claim as build-specific community observation.
What players do know comes from play: waves escalate in density and introduce tougher targets over time, and the long-term arc is seasonal — the developer tells players to push the front line through every season. Waves are the currency of that push. Holding a line longer means more kills, more Credits, more upgrade momentum for the next cycle.
Official source: Zombie Air Force on Roblox — the developer description confirms air combat, deployable defenses, giant Behemoths and the seasonal front line push.
Target Priority: What to Kill First
Wave survival is mostly a targeting problem. The four confirmed weapon categories map onto three target classes:
| Target class | Tool | Why |
|---|---|---|
| Dense clusters | Rockets, air strikes | Area damage deletes groups per cooldown |
| Strays and flanks | Chain gun | Sustained fire, no wasted ordnance |
| Boss-tier (Behemoths) | Rockets + air strikes | Single-target burst against big HP pools |
| Ground-bound adds | Deployed defenses | Auto-cover while aircraft stay airborne |
The mistakes that end runs are predictable. Pilots dump air strikes on single zombies, then have nothing for the cluster that actually threatens the line. Chain-gun builds try to out-DPS a Behemoth that needs burst ordnance. Everyone chases the same fat target while the spawn-side perimeter quietly overflows. The rule that fixes all three: area tools on density, sustained tools on individuals, burst tools on bosses — never the other way around.
The Behemoth guide breaks down the boss end of this priority, including why chain guns underperform against boss HP by community consensus.
Ground Defense: The Line That Actually Fails
Aircraft are what players notice; the ground line is what kills runs. Deployable defenses are a confirmed weapon category, and on most maps the failure sequence is identical — turrets placed once at wave start, overwhelmed by the third push, rear lane floods while every pilot is still strafing midfield.
Placement rules that transfer across maps:
- Anchor the spawn-side perimeter first — kills adds before they build momentum.
- Funnel with structures — building edges and choke points concentrate zombie flow into turret arcs.
- Cover your re-arm path — the route pilots fly between runs is a spawn vector too.
- Re-drop every cycle — defenses are a mid-wave rotation, not a one-time setup.
Budget Credits for re-drops. The biggest defense mistake is hoarding for one expensive upgrade while the line burns; unspent Credits between waves buy nothing. The credits guide covers the earning side of that discipline.
Two turrets on a real choke point out-perform five spread across open ground. On map-specific placement logic, the airport guide walks through open-terrain positioning.
Squad Coordination on a 10-Player Server
Servers cap at 10 players (confirmed via the official games API), which is enough to run a real wave-defense split:
| Role | Count | Job |
|---|---|---|
| Wave clear | 3-4 | Chain gun sweeps on spawn lanes |
| Strike pilots | 2-3 | Rockets and air strikes on clusters |
| Ground crew | 2 | Defense drops, perimeter holds |
| Flex | 1-2 | Rotates to the failing side |
Two coordination failures show up constantly. First, the whole server runs the same build — ten chain-gun pilots who cannot answer a cluster wave or a boss. Second, a Behemoth spawns and every aircraft abandons wave defense to dogpile it, letting the swarm eat the ground line behind them. Split the boss off: DPS builds handle the Behemoth, wave clear stays on the swarm, ground crew keeps re-dropping. The best build page defines each role's loadout.
If your server is short-staffed, the ground-crew role is the correct volunteer slot — it needs the least upgrade investment and teaches the wave flow fastest.
Resource Discipline Between Waves
Every wave ends with a lobby window, and that window is where runs are won or lost. The rhythm:
- Spend Credits between waves, never hoard — upgrade damage depth over category breadth.
- Redeem codes at session start —
SORRYpays 2,500 Credits plus an hour of EXP boost; codes are confirmed live on the codes page. - Stack buffs before long sessions — group join (+10% XP & Credits), friend invite (free buff) and the weekend x2 are all confirmed in the official description.
- Front-load grinding into weekends — the x2 multiplier dominates earning rate.
Playtime and daily-reward systems are also documented in community video coverage — Berlian Kecil's gameplay video references daily rewards and playtime bonuses directly — adding passive income to sessions you sit through anyway. Exact daily amounts are unconfirmed. GameRant's codes page and ProGameGuides both confirm the shop redemption flow for claiming the flat-Credit codes above.
Scaling Into Late Waves
Late-wave survival is a build-and-economy question more than a reflex one. Waves escalate in density; the answers escalate with them:
| Wave pressure | Response |
|---|---|
| Denser clusters | More rocket/air strike depth in the tree |
| Armored stragglers | Chain gun sustain upgrades |
| Boss arrivals (Behemoths) | Dedicated strike builds + role split |
| Lane overflow | More defense drops, tighter re-drop cadence |
The upgrade tree holds over 180 upgrades across the four categories (official description), and the late-game mistake is even distribution — a pilot with a little bit of everything cannot answer any single spike. Pick a lane, push it deep, and let squad composition cover what your build does not. The upgrades guide maps the tree; the honest caveat is that Alpha balance passes can reweight it at any time.
FAQ
How do waves work in Zombie Air Force?
Kill zombie hordes from the air while deployed defenses hold the ground line, then push the seasonal front line with the Credits and EXP you earn. Exact wave counts and spawn tables are not published — the confirmed loop is fly, clear, deploy, repeat, with escalating density and boss arrivals over time.
What is the hardest wave in the game?
Unconfirmed. No official source, tracker or fan wiki documents a wave difficulty table, so any "hardest wave" claim is anecdotal and build-dependent. Community play points to boss waves — those that spawn Behemoths — as the real run-ends, since they pull squad attention off the swarm.
Why do my defenses keep getting destroyed?
Almost always placement and cadence, not quantity. Turrets set once at wave start die to the second or third push. Anchor the spawn-side perimeter, funnel zombies through structural choke points, and re-drop on every wave cycle — defenses are a rotation, not a setup.
Should I focus the Behemoth or the swarm when a boss spawns?
Split the squad. Boss DPS builds (rockets and air strikes) stay on the Behemoth; wave-clear builds and ground crew stay on the swarm. The common failure is every aircraft dogpiling the boss while the ground line drowns behind them — the Behemoth guide covers the full role split.
Do weekend buffs affect wave farming?
Yes — the weekend x2 buff is confirmed in the official description, and it doubles whatever your wave clearing earns. Long grinding sessions belong on Saturday and Sunday; weekdays are for builds, codes and planning.
Related Guides
- Zombie Air Force Behemoth guide — the boss half of every late-wave fight.
- Zombie Air Force best build — role loadouts for wave clear, defense and boss DPS.
- Zombie Air Force airport map guide — defense and flight-route logic on open terrain.
- Zombie Air Force credits guide — turning wave clears into upgrade momentum.
More Zombie Air Force Guides
How to get Credits fast in Zombie Air Force: wave payouts, co-op runs, weekend x2 buff, group bonus and free credits from working codes.
Zombie Air Force tier list ranking aircraft and weapons by wave clear, boss damage and co-op value, with picks for every playstyle in Roblox.
Zombie Air Force has 180+ upgrades across rockets, chain guns, air strikes and defenses. Here is how the upgrade tree works and what to buy first.